Installation Techniques for Fastening Wedges and Maintaining Crusher Component Stability
Among crusher components, fastening wedges may seem unremarkable, yet they serve as the “anchor” ensuring stable operation of core equipment like jaw crushers and cone crushers. We often hear customers complain that newly replaced jaw plates loosen, produce abnormal noises, or even cause severe equipment damage within months. Upon investigation, the root cause is almost always faulty wedge installation—either under-tightened, misaligned, or simply the wrong model used. Neglecting this small component directly reduces the uptime and safety factor of the entire production line. Today, drawing on over a decade of field maintenance and spare parts supply experience, I’ll thoroughly explain the correct installation techniques and daily maintenance essentials for locking wedges. This will help you save money and worry, ensuring long-term stability for your crusher components.
I. More Than Just “Hammering It In”: How Locking Wedges Work and How They Fail
Many treat installing locking wedges as mere brute force—swinging a sledgehammer to drive them in. This approach creates significant hidden risks. Proper installation requires understanding how they function.
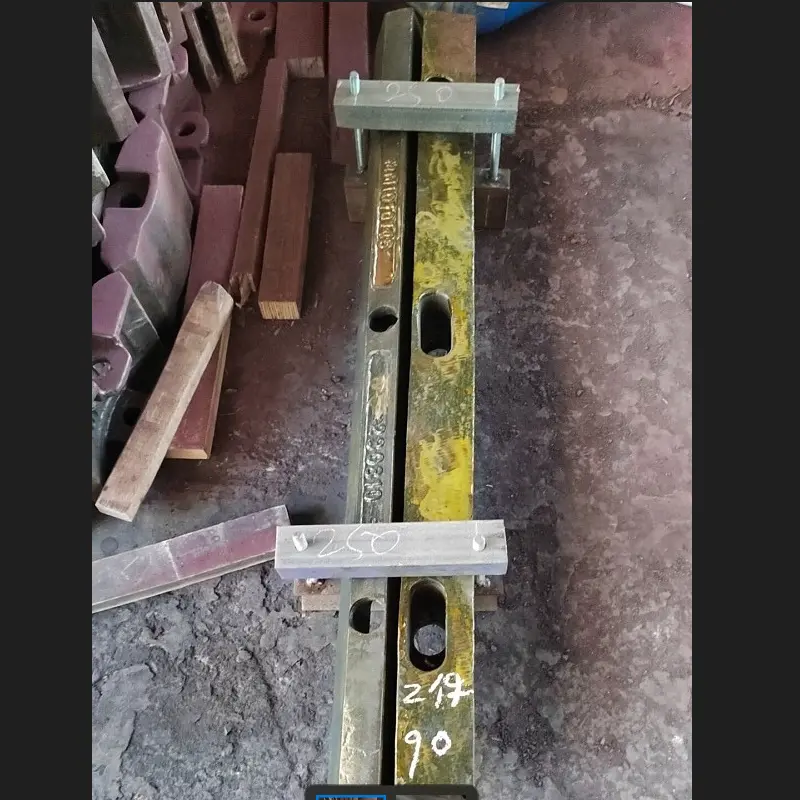
In jaw crushers, the moving jaw plate and moving jaw body, along with the fixed jaw plate and frame, are typically secured by two sets of locking wedges—upper and lower. Their principle relies on the self-locking effect of inclined planes: when struck from the side (or top), the two paired inclined surfaces squeeze against each other, generating a massive vertical component force that firmly “clamps” the jaw plate to the jaw body or frame. This force must be applied uniformly and continuously to withstand the immense alternating impacts and vibrations produced during ore crushing.
Common wedge failure modes include three primary types:
1. Loosening: The most prevalent issue, often caused by insufficient initial preload, foreign objects or oil contamination on the mounting surface, or inadequate machining precision of the wedge/liner bevels, leading to self-locking failure.
2. Fracture: Typically caused by incorrect material selection (using plain steel instead of alloy steel), stress concentration due to unilateral loading during installation, or internal cracks resulting from excessive hammering force.
3. Wear and deformation: Prolonged operation under micro-vibration causes bevel wear, resulting in loss of preload.
Industry Case Reference:
Last year, a quarry client in Shandong reported that the fixed jaw plate of their PE600×900 jaw crusher loosened three times within a month. Our on-site inspection revealed that the wedges they purchased had a bevel angle approximately 0.5 degrees smaller than the original factory parts. This minute angular discrepancy resulted in insufficient self-locking friction, causing the wedges to slip easily under continuous vibration. After replacing them with the correct-angle, factory-standard wedges, the issue was completely resolved, and the jaw plate has operated stably ever since. This case demonstrates that precise part dimensions are fundamental.
Common User Questions:
“Does harder mean better for locking wedges?”
Not necessarily. Excessively hard wedges lack essential toughness and are prone to brittle fracture under impact. The ideal material is high-strength alloy steel, tempered through heat treatment to achieve a “hard exterior, tough interior” state—high surface hardness for wear resistance, while maintaining core toughness to absorb impact energy. Substandard products either suffer from insufficient hardness and deformation susceptibility or improper heat treatment, rendering them as brittle as glass.
II. Step-by-Step Approach: Standard Fastening Wedge Installation Procedure (with Practical Details)
A standardized installation process eliminates 90% of subsequent issues. Here, we use the replacement of a jaw crusher’s movable jaw plate as an example:
1. Cleaning and Inspection (Critical First Step): After removing the old jaw plate and wedges, thoroughly clean all rock dust, oil residue, and old adhesive remnants from the moving jaw body mounting surface and wedge slots using a scraper and wire brush. Then inspect the mounting surface and the back of the new jaw plate for flatness, ensuring no protrusions or pits are present. Any foreign material will reduce contact area and cause stress concentration.
2. Placement and Initial Alignment: Carefully hoist the new jaw plate into position. First insert the lower (or rear) set of tightening wedges, then use a hand hammer for preliminary tapping to roughly position the jaw plate. This step allows the jaw plate to find its natural position without forced alignment.
3. Gradual Hammering for Pre-tensioning: This is the critical step. Use a heavy copper hammer or specialized hydraulic hammer, not a standard steel hammer (to prevent sparks or wedge damage). Hammering must begin at the narrow end (thin end) of the wedges, applying force alternately and progressively on both sides. For example, strike the left side twice, then the right side twice, gradually increasing force. Progress is judged by observing whether the gap between the jaw plate and jaw body closes evenly. Never hammer one side all the way in at once, as this will cause the jaw plate to tilt and create unilateral stress.
4. Final Locking and Inspection: When the hammering sound becomes dull and solid, and a 0.1mm feeler gauge reveals no gap between the jaw plate edge and body, the preload requirement is met. Finally, install and tighten the wedge fixing bolts (if present) to prevent them from popping out during operation.
Industry Case Reference:
During annual maintenance at a major Southeast Asian mine, we observed that when replacing cone crusher bowl liners, they used only a single hydraulic jack to tighten the wedges from one side. This resulted in localized cracking of the new liner after less than 100 operating hours. Our engineers corrected the process by applying pressure symmetrically with two jacks diagonally opposite each other, ensuring uniform circumferential preload. Subsequently, the average service life of the concave liners increased by over 15%. This demonstrates the critical importance of uniform force distribution.
Frequently Asked Questions:
“Should lubricant or grease be applied to the back of the jaw plate or the wedge bevel during installation?”
Absolutely not! Lubricants drastically reduce the friction coefficient between bevel surfaces, compromising the self-locking mechanism. Installation surfaces must remain dry and clean. In certain operating conditions, a very thin layer of molybdenum disulfide dry film lubricant may be applied for rust prevention and easier future disassembly, but this requires professional guidance. Standard practice is “dry installation.”
III. Prevention is Better than Cure: How to Maintain Component Stability Through Routine Inspections?
Installation is only the first step. Ensuring long-term stability of key crusher components relies on daily “observation, listening, inquiry, and diagnosis.”
• Auditory Inspection: Experienced operators can detect anomalies through the crusher’s operational sounds. Rhythmic, sharp metallic clinking (distinct from the dull thud of normal ore crushing) likely indicates a loose wedge, causing minor impacts between jaw plates or liners in the impact gap. This is an immediate signal to shut down for inspection.
• Visual and Tactile Inspection: After regular shutdowns (e.g., per shift or daily), tap each wedge block with an inspection hammer. A solid, crisp sound indicates optimal condition; a hollow or dull sound suggests potential loosening. Simultaneously observe whether the exposed length of wedge blocks has changed (increased length indicates loosening) and check jaw plate edges for friction marks indicating relative displacement.
• Institutionalized Tightening: For equipment operating under extreme conditions (e.g., crushing high-hardness granite), consider implementing a preventive retightening protocol. After 8-24 hours of operation with new components installed, shut down the machine and perform a comprehensive retightening of all fastening wedges to compensate for loss of preload caused by initial wear-in and stress relaxation.
Common User Query:
“We inspect fastening wedges during every shutdown, so why does loosening persist?”
This likely indicates deeper issues:
First, substandard component quality (e.g., non-compliant material, hardness, or angles);
Second, deformation or fatigue cracks in the equipment foundation or frame, causing uneven mounting surfaces; Third, dimensional deviations in the clamped jaw plates or liner plates causing poor fit. For recurring loosening, conduct systematic measurement and troubleshooting instead of merely retightening.
IV. Extended Recommendations for Purchasers and Maintenance Managers: From Component Selection to System Management
As a purchaser or equipment manager, your decisions impact the entire operation:
1. Prioritize “Quality” over “Price” in procurement: Select fastening wedges with formal heat treatment reports and precision machined dimensions (especially bevel angles and surface finish). While original equipment manufacturer (OEM) parts or equivalent-standard branded components may have a higher unit cost, the enhanced equipment stability and safety they provide result in significantly lower overall costs compared to frequent downtime and unplanned maintenance.
2. Establish a parts archive and standardized procedures: Create a replacement and tightening log for each critical piece of equipment. Document the brand of each replacement part, the installer, the preload torque (if using hydraulic tools), and subsequent operational performance. This facilitates root cause analysis and standardizes best practices for installation.
3. Empower Field Teams: Communicate the installation techniques and maintenance essentials outlined here to frontline maintenance personnel through training or work instructions. Ensure they understand the “why” behind procedures, not just the “what.”
In summary, the installation and maintenance of tightening wedges is a discipline that integrates physical principles, material science, and practical experience. When executed correctly, you replace more than just a jaw plate—you gain sustained, reliable productivity. It safeguards not only the equipment but also your production schedule, safety record, and profit margins. In crushing operations, stability equals efficiency; stability equals safety.
FAQ (Frequently Asked Questions)
Q1: Which fastening method is superior—tightening wedges or hydraulic nuts (e.g., on cone crushers)?
A: Both serve distinct applications and principles; neither is inherently superior. Tightening wedges rely on mechanical self-locking, featuring simple structure and low cost. They are widely used in equipment like jaw crushers but demand high installation skill. Hydraulic nuts achieve precise, uniform pre-tensioning and easy disassembly through hydraulic pressure, making them particularly suitable for securing large cone crusher liners. They provide more stable and reliable clamping force but involve a more complex system and higher cost. For high-value, high-load critical components, hydraulic nuts represent the trend.
Q2: After removing old wedges, they appear undamaged. Can they be reused?
A: This requires extremely careful evaluation. Thoroughly inspect their working surfaces for visible crushing deformation, cracks, or wear steps. Use calipers to verify critical dimensions remain within tolerance. If operating conditions are severe or the wedges have served for extended periods, direct replacement is recommended. Reusing old wedges with plastic deformation cannot provide reliable preload and may lead to greater losses from minor issues.
Q3: Can pneumatic wrenches or high-power impact wrenches be used when installing locking wedges?
A: Generally not recommended, especially for beginners. Pneumatic tools deliver high impact forces that are difficult to control, easily causing instantaneous overload and resulting in wedge fracture or thread damage (if present). Manual hammering (using a sledgehammer) or specialized hydraulic tensioning/driving tools offer more controllable and safer alternatives. Manual hammering also allows installers to gauge preload through tactile feedback—a sensation machines struggle to replicate.
Meta Description: Mastering proper wedge installation techniques is essential for ensuring crusher component stability. This article details operating principles, standard installation procedures, daily inspection checkpoints, and procurement recommendations to help mines and quarries eliminate loosening hazards while boosting equipment uptime and safety. Read now for frontline practical insights.
Keywords: Tension wedge installation, crusher component stability, jaw crusher maintenance, tension wedge failure modes, crusher daily inspections
Post time: Jan-28-2026