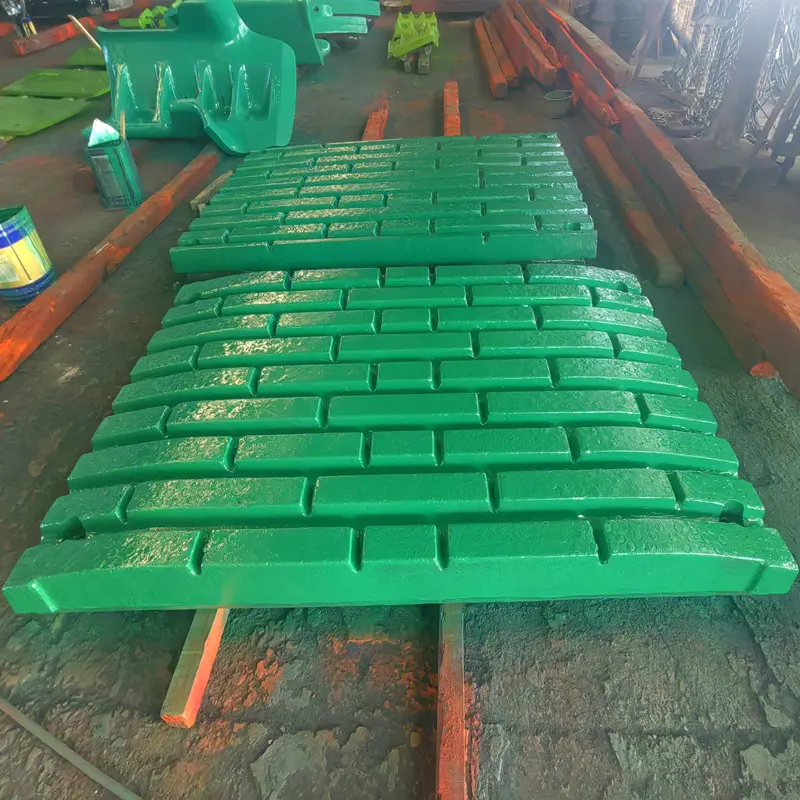
Installation Guide: When replacing the jaw plate and liner plate, it is necessary to pay attention to the torque and clearance adjustment
In the equipment maintenance team, there is a popular saying: “What crushers fear is not wear and tear, but incorrect replacement.” This is true. A careless replacement may not lead to a restart of the equipment, but rather continuous vibration, abnormal wear and tear, and even the risk of sudden shutdown. For jaw crushers, the replacement of their core wear-resistant parts – the jaw plate and the liner plate – is precisely the key to this meticulous operation. This guide will focus on two professional points that are often overlooked by many on-site maintenance personnel but are crucial: tightening torque and fit clearance, helping you elevate your installation work from “resuming operation” to “optimizing performance”.
I. Safety and Preparation: The Foundation of All professional Operations
The sufficiency of the preparatory work before coming into contact with any tool determines the tone of the assignment. When replacing heavy components like the jaw plate, safety is the top priority.
Energy isolation and safety confirmation: Implement strict power-off, locking, and tagging procedures. Make sure that the main motor and control circuit are completely powered off and there is a dedicated person to supervise. This is an unbreakable rule for preventing accidental starts and ensuring personal safety.
Inspection of tools and accessories: Prepare appropriate lifting equipment (such as cranes), special wrenches, torque wrenches, and newly arrived jaw plates/liners. Carefully inspect the new accessories to ensure they have no casting defects and that their models are completely compatible with the equipment. A device cannot operate well with the wrong parts.
Work space cleaning: Thoroughly clean the crushing chamber to ensure there are no residual materials or debris inside. This is not only for smooth installation, but also to prevent foreign objects from causing accidental damage to the new wear-resistant parts during the first start-up.
Ii. Disassemble old parts: Observe wear and tear to provide information for subsequent installation
Disassembly is not only a process of removing old parts, but also a valuable opportunity for equipment “diagnosis”. During the disassembly process, please pay attention and observe:
Bolt condition: Is the old fastener easy to remove or has it become loose? Are there any signs of stretching or damage to the bolt holes? This can indirectly reflect whether the torque of the last installation was appropriate.
Wear pattern: Observe whether the wear of the old jaw plate is uniform. If abnormal eccentric wear occurs, it is very likely to indicate that there is a problem with the alignment of the movable jaw assembly or the frame, and a special inspection needs to be carried out when installing new parts or subsequently.
Pad and support structure: Inspect the contact surface between the support pad on the back of the fixed jaw plate or liner and the frame. If the old parts are severely adhered, the contact surface must be carefully cleaned to ensure that the foundation is flat when the new parts are installed.
Iii. Installation of New Parts: The Precise Art of Torque Control
The core of installation lies in “a stable fit”. This entirely depends on the correct and uniform tightening torque.
Cleaning and positioning: Thoroughly clean the frame mounting surface, the back of the new jaw plate/liner, and all bolts and bolt holes with anhydrous ethanol or professional cleaning agent. Any oil stains or debris will affect the bonding accuracy, causing fretting wear or stress concentration after installation. Use hoisting tools to smoothly and accurately place the new parts into the crushing chamber.
Bolt selection and pre-tightening: High-strength bolts of the specifications specified by the equipment manufacturer must be used. Do not use ordinary bolts as substitutes. They are prone to failure under continuous impact loads. After manually screwing in all the bolts, initially tighten the bolts in two to three steps in the diagonal crossing sequence. The purpose of this step is to ensure that the wear-resistant parts are evenly attached to the frame and eliminate the gap.
Final torque tightening – the most crucial step: Use a calibrated torque wrench and strictly follow the torque values specified in the equipment technical manual for the final tightening. Also follow the diagonal sequence. There is no “approximately” torque: Insufficient torque will cause the bolt to gradually loosen during operation, leading to component movement and impact. If the torque is too large, it may cause the bolts to stretch or even break, or lead to micro-cracks in the high manganese steel jaw plate/liner itself, laying a hidden danger of fracture. This is a stage that requires precision rather than brute force.
Iv. Gap Adjustment: The soul that determines product particle size and operational efficiency
After the installation is completed and all bolts are confirmed to be tightened, the next step is to adjust the gap of the discharge port, which directly determines the final particle size of the product and the processing capacity of the crusher.
Initial inspection and tooth profile meshing: First, manually rotate the movable jaw to make a full cycle and check if there are any obvious hard interference points. At the same time, confirm that the tooth profile arrangement of the fixed jaw plate and the movable jaw plate is correct: the tooth peaks of one jaw plate should be aligned with the tooth valleys of the other jaw plate, which is a prerequisite for achieving effective extrusion crushing.
Measurement and setting target values: Based on the particle size of your target product, refer to the equipment manual or empirical data to set the target value for the width of the discharge port. Use professional gap gauges or feeler gauges to measure the actual gap at multiple points at the bottom of the crushing chamber to ensure it meets the set requirements. For jaw crushers, gap adjustment is usually achieved by changing the position of the rear thrust plate through an adjustment mechanism (such as inclined irons or gaskets).
Dynamic verification during operation: Start the crusher without load. Under the condition of no abnormal noise and severe vibration, run it for a few minutes and then shut it down. Be sure to check the tightness of the key bolts again after the equipment has completely stopped. Because after the initial force is applied, some bolts may be slightly loose and need to be tightened once according to the torque requirements. Ultimately, under a small feeding load, the particle size of the output and the operating current of the equipment were observed to verify the adjustment effect.
V. Closure and Record-keeping: A Closed loop for the Complete maintenance cycle
Good maintenance work should be carried out from beginning to end. Clear all tools and replaced old parts from the site, and fill in detailed maintenance records, including the replacement date, the torque value used, the set final clearance, and the observation of equipment status before and after replacement, etc. This record is not only a summary of this work, but also an important data asset for future fault analysis, predictive maintenance and spare parts management.
In conclusion, replacing the jaw plates and liners is far more than just taking them apart and replacing them with new ones. It is a systematic operation that ensures structural reliability through precise torque control and optimizes process performance by adjusting fine clearances. By grasping these two core points, what you complete will not only be a maintenance, but also a deep investment in the health of the equipment and production efficiency.
Post time: Dec-10-2025